Sistem Informasi Berbasis Web Web-Based Information System
Sistem Informasi Berbasis Web Web-Based Information System
not think of what are the benefits of a Site / Web? Penah not think of what are the benefits of a Site / Web? sometimes a lot less people are so interested in creating a Site / Web because basically a lot of people think the only web monotone on E-commerce, but do you know about a web can also be used to process information to enable a person within an organization, be it a school, a company , or a government agency.
sometimes a lot less people are so interested in creating a Site / Web because basically a lot of people think the only web monotone on E-commerce, but do you know about a web can also be used to process information to enable a person within an organization, be it a school, a company , or a government agency.
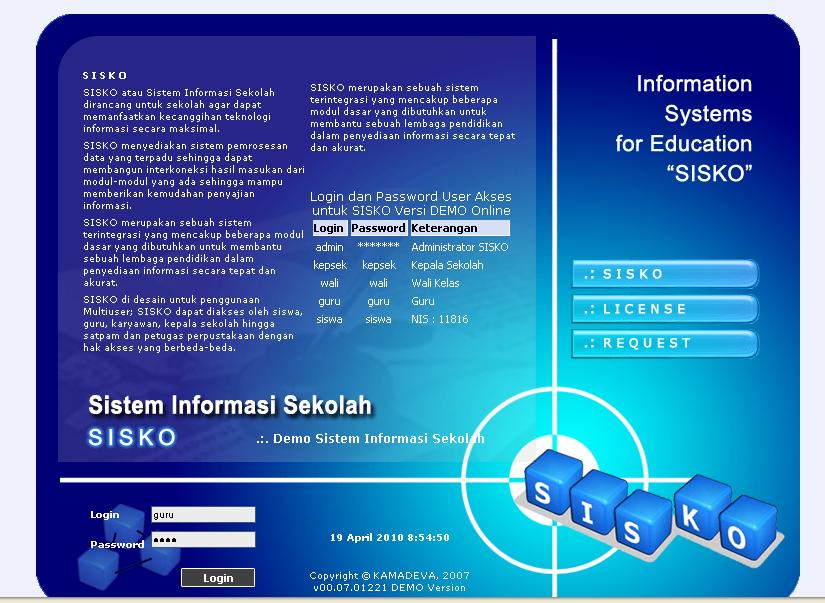
berikut adalah sebuah web yang digunakan disebuah badan kepegawaian daerah di DIY yang menarik adalah adanya SIMPEGDA (Sistem Informasi Manajemen Kepegawaian Daerah) yang berbasis web. The following is a web that used disebuah staffing agency in the DIY area of interest is the presence of SIMPEGDA (Regional Personnel Management Information System) is web based. Dari segi tampilan dan fasilitas sih biasa saja. In terms of appearance and facilities still casual. Yang bagus adalah infrastruktur jaringan antar SKPD dan sistem prosedur yang sudah bagus. A good network infrastructure and system inter SKPD already good procedures. Di sana semua SKPD sudah terkoneksi dalam satu jaringan intranet. There all SKPD are connected in one network intranet. Uniknya mereka menyewa layanan kabel dari suatu Internet Service Provider. Uniquely they rented from a cable service Internet Service Provider. Alasannya di DIY jaringan wireless sud The reason in DIY wireless network sud
ah terlalu crowded, jadi mau tidak mau harus mengalah, karena kalah start. ah too crowded, so it must inevitably succumb, because losing start. Aneh ya, kok di sini pihak pemerintah kok mau mengalah, di daerah lain kalau urusan pemanfaat frekuensi ini pemerintah ya nomor satu. Strange yes, really here the government really want to give in, in other areas if the affairs of government utilizing this frequency it number one. Yang lain harus mengalah. The others must succumb.
Di DIY, Simpeg dikembangkan secara bertahap. In DIY, SIMPEG developed gradually. Awalnya pihak dari BID (Badan Informasi Daerah) DIY membentuk jaringan antar SKPD. At first party of the BID (Regional Information Agency) DIY form a network between SKPD. Karena alasan teknis, BID memutuskan memakai layanan kabel dari salah satu ISP yang ada di sana. Due to technical reasons, BID decided to use the cable service from one ISP's there. Setelah jaringan terbentuk dan muncul gagasan untuk membangun Sistem Informasi Kepegawaian. Once the network is formed and the idea emerged to build the Information Systems Officer. Akhirnya dikembangkan Simpeg berbasis web yang datanya diambil dari PUPNS tahun 2003. SIMPEG finally developed a web-based data taken from PUPNS 2003. Setelah data dasar masuk di database, kemudian ditunjuklah seorang operator dari masing-masing SKPD. Once the basic data entry in the database, then instituted an operator from each SKPD. Operator di sini bertanggung jawab atas data di SKPDnya sendiri. Operators here are responsible for the data in SKPDnya own. Namun banyak faktor yang mempengaruhi jalannya sistem informasi berbasis web. But many factors that influence the course of a web-based information systems. Presentasi kegagalan suatu sistem meliputi : Presentation of a system failure include:
1. 1. Teknologi Informasi dan Komunikasi hanya berperan sekitar 20%. Information and Communication Technology plays only about 20%.
Komponen TIK adalah: ICT components are:
Komponen TIK adalah: ICT components are:
- hardware hardware
- software software
- jaringan network
- database database
2. 2. Sedangkan 80% sisanya adalah faktor-faktor berikut: While 80% were the following factors:
- Sumber Daya Manusia Human Resources
- organisasi organization
- budaya kerja work culture
- sistem prosedur system procedures
- sistem / payung hukum system / legal
- dukungan pimpinan, meliputi: dana dan kesinambungan leadership support, including: funding and sustainability
- integrasi antar sistem integration between systems